AI IMAGE TEST
AI image test: real photo or generated?
AI images are not limited to portraits. This test mixes faces, animals, food, nature, places and products so you have to judge realism across very different kinds of visual detail.
A repeatable method
Don't guess from one clue. Inspect in layers.
The most useful skill is not memorizing yesterday's AI mistakes. It is learning where several parts of an image must agree with each other.
1. Read the whole image
Start at normal size. Ask whether the scene, expression, lighting and camera feel belong together before hunting for tiny defects.
2. Zoom into high-information areas
Eyes, hair edges, teeth, glasses, fingers, reflections and contact points force many visual relationships to agree at once.
3. Compare, don't stereotype
One smooth cheek or unusual tooth proves very little. Compare several independent clues and look for contradictions.
4. Make a weighted decision
Give more weight to structural inconsistencies than to vague 'AI vibes'. Modern generated images can be extremely convincing.
Visual field guide
Where to look — and why it matters
These are comparison zones, not automatic proof. A strong judgement usually comes from several clues pointing in the same direction.
Edges and boundaries
Look where hair, fur, fingers, objects or clothing meet the background. AI can create subtle merging, missing separation or inconsistent fine detail.
Texture variation
Real photographs usually contain irregular micro-texture. Generated images can make skin, fabric, food, foliage or surfaces look unusually even or locally inconsistent.
Reflections and lighting
Check whether highlights, shadows and reflections agree with each other. Small contradictions can be more informative than the overall realism of the image.
Text and geometry
Signs, labels, repeating patterns and rigid shapes are useful comparison points. Modern models are better at them than before, but small structural errors still appear.
Visual lesson · Test your eye
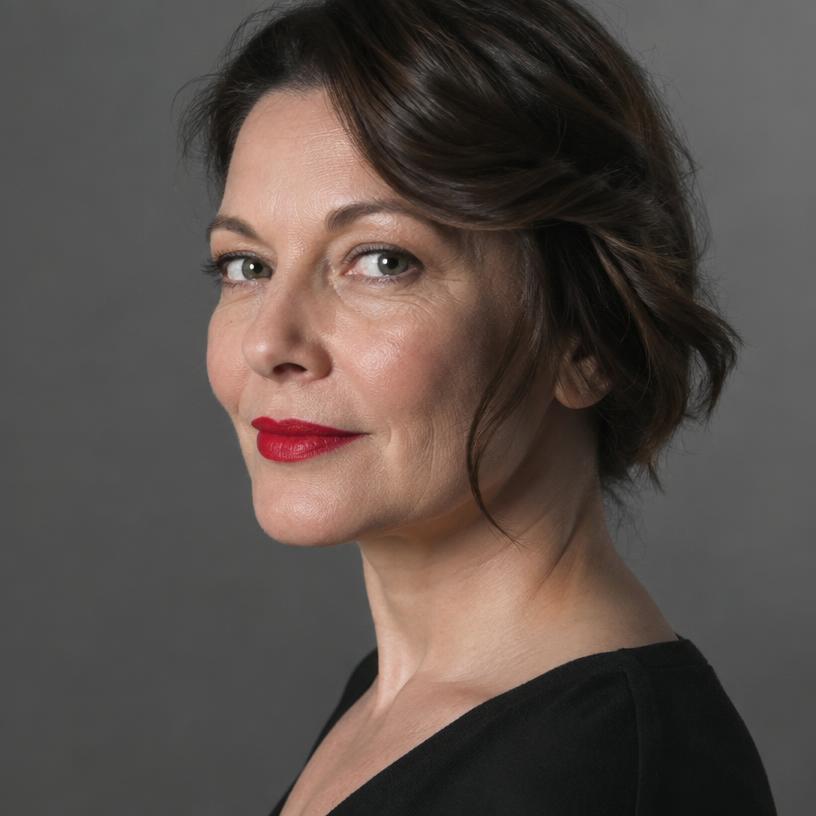
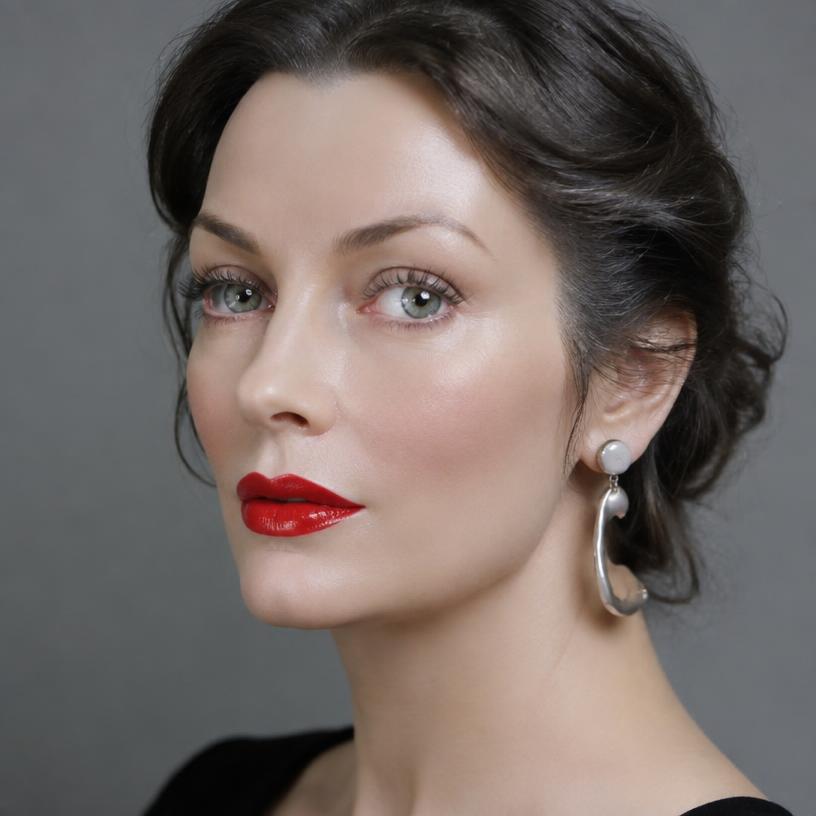
Eyes, cheek texture and hair edges
Separate visual style from evidence by comparing the three exact regions marked in both portraits.
The numbered markers correspond directly to the numbered explanations below.
 A123
 B123
Eyes and eyelids
Marker 1 is on the eyes. Compare iris structure, catchlights, lashes and the contour of the eyelids.
Cheek skin texture
Marker 2 is on the cheek. Compare pores, fine lines and whether skin texture changes naturally with light and focus.
Hair / ear boundary
Marker 3 is at the hair-side boundary. Inspect fine strands and the transition between hair, skin, ear and background.
Takeaway: Every numbered marker should correspond to a clearly identifiable physical feature. That makes the lesson easy to understand and easy to verify visually.
Strong clues
Several independent inconsistencies that reinforce each other: geometry, lighting, reflections, anatomy, contact points or local texture that does not fit the same camera and scene.
Weak clues
“Too perfect”, smooth skin, dramatic lighting or one odd feature. Real photography, retouching, compression and portrait mode can create all of these too.
Different categories expose different weaknesses
Faces reward close inspection of hair, eyes, skin, teeth and accessories. Animals add fur, feathers and anatomy. Food introduces glossy surfaces, repeated ingredients and fine texture. Places and products add rigid geometry, text, reflections and manufactured repetition.
A mixed AI image test is useful because it prevents you from depending on one category-specific shortcut. You have to adapt your inspection strategy to the subject in front of you.
Why mixed tests are harder than face-only tests
People are extremely familiar with faces, which makes subtle facial errors easier to notice. We are less sensitive to the exact structure of leaves, distant architecture, packaging or animal anatomy. A generated scene can therefore feel believable even when it contains small errors.
The solution is to identify high-information areas for each category. On a product, inspect logos, labels, seams and reflections. In nature, compare branching, repeated textures and depth. In food, inspect ingredient boundaries, utensils and contact shadows.
Use the explanation after every answer
A score tells you whether you were right. An explanation tells you why. FaceOrBot's post-answer feedback is designed to point to concrete details in the actual pair so that each question becomes a small training example.
If you miss a difficult image, spend a few extra seconds comparing the explanation with both sides before continuing. That is often more useful than immediately moving to the next question.
Remember
A visual clue is evidence — not proof.
A real photo can contain blur, strange teeth, aggressive sharpening, beauty filters or broken-looking edges. An AI image can be almost flawless. Confidence should rise when several independent details fail in a consistent way, not because one feature looks unusual.
Frequently asked questions
What categories are in the AI image test?
FaceOrBot includes faces, animals, nature, food, places and products, plus mixed rounds.
Is this an AI detector?
No. It is a human visual test and learning game, not a forensic classifier.
Can I choose only one category?
Yes. You can play individual categories or use mixed mode for broader practice.
Train your eye instead of memorizing rules
FaceOrBot gives immediate feedback after every choice and explains what was worth inspecting. That makes each round a short visual lesson rather than just a score.